Printing a Schedule
To print a schedule in black & white:
- Sign in to Facility Scheduler.
- In the navigation bar, click Schedule.
- If you wish to change the view or sort order, click Change Filter and select filter options.
- Click Print View.
- The selected schedule displays.
- Click Send to Printer.
- A print preview page displays allowing you to select print settings.
- Click Print.
To print a schedule with colors and shading you must update your browser settings.
Note: The steps listed below apply to the Internet Explorer browser. Steps to update print settings in Firefox, Chrome, or Safari may differ.
To update browser settings:
- From the browser menu bar, select Tools > Internet Options.
- Click the Advanced tab.
- Scroll to the Printing section.
- Select Print background colors and images.
- Click Apply.
- Shading and colors will print for all future printing unless you clear the Print background colors and images check box.
- Select File > Page Setup.
- Set the page size as Letter (8.5 x 11) in Landscape orientation.
- Set all margins to 0.25 inch.
- Click OK to print to your local printer.
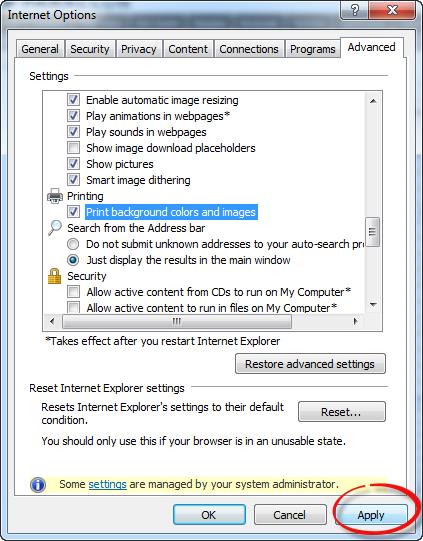
Internet Options > Advanced Settings Menu
Additional Information
Schedule Overview
Schedule Navigation
Viewing the Schedule